Friday, November 23, 2018

Black And Gold Christmas Stocking Collection Set


This is the Black Gold Christmas Stocking Collection set (It is a set of 4 stockings.) It is listed on Etsy. If you are interested, you can visit my Etsy shop. Just click the link below to get to my Etsy shop.


Black and Gold Chirstmas Stockings
Black and Gold Christmas Stocking Collection


Black and Gold Christmas Stockings


Black and Gold Christmas Stockings


Black and Gold Christmas Stockings


Wednesday, November 7, 2018

Nutmeg Christmas Stocking Collection for Sale on Etsy


Check out my Christmas Stocking collection I have made and placed in my Etsy shop. Just click the link below.

Nutmeg Christmas Stocking Collection


Nutmeg Christmas Stocking


Sunday, November 5, 2017

Making Christmas Stockings


I have decided to make and sell Christmas stockings this year.  Several friends have requested a few, so I haven't been able to make more to place in my shop. Below are some that I have completed. I plan to do a lot more next year and have a give-away for a few lucky winners, so make sure you check back in 2018! You can reach me by copying and pasting the following links in your browser or click one of  the sidebar links just to the right of this message.
My websit at www.marvasspot.weebly.com,
Like me on Facebook https://www.facebook.com/christmasstockings4u/ 
My Etsy Shop https://www.etsy.com/listing/562299985/santa-claus-black-christmas-stocking?ref=related-1

black Christmas Stocking
Bow Has Frayed Edges
black Mrs Claus Christmas stockingBlack Santa Claus Stocking


Sunday, November 27, 2016

Butterick 3782

I wanted to try my hand at making an infant jacket along with the dresses I have been sewing. I had B3782 and B5860 which are pretty much the same pattern. My very first attempt at making this jacket was using an interlock knit. The interlock knit that I selected was too light weight. If I was going to continue to use this "Beginners" knit, I would need to reinforce the seems at the lower edge of the jacket, and, besides, this fabric would probably look awful after the first wash.    The second knit I selected was a rib knit I purchased from Joann Fabrics. I forgot my reason for not wanting to use this fabric, perhaps it was the way it draped. Anyway, I made two jackets using this knit, and I ended up throwing them both out.

The suggested type of fabric to use for the jacket is a moderate stretch knit such interlock. After several failed attempts at using the knits suggested that I did not care for, I decided to use fleece. I had about a yard of the gray blizzard fleece in my stash. I had already made a few alterations to this pattern before using the fleece. The  one alteration I made before sewing with fleece was increasing the arm at the bicep. I thought that the increase would be needed because the fleece did not have as much stretch as the interlock, but it was not necessary. And the second alteration was increasing the neckline. I don't know why the neckline is so small. I had to add about 1/2 inch to both sides of the back in order for this jacket to fit properly around the neck.

For the gray^ jacket, I made facings. The pattern instructs you to sew a 5/8 seam allowance around the neck, but that is too small for me to
work with if I wanted the seam to look nice. Both jackets have facings. I forgot to mention the other alterations that I made to this jacket and that being the pleat in the back and dividing the back pattern piece. What I like about this pattern is the versatility. It's a basic looking pattern, but you can give it many looks.

After making and using facings, I thought I would give lining the jacket a try. This is not a lined-jacket pattern, so I had to find online instruction on how to line a jacket.  It took me several searches before I found a tutorial that I could actually understand.  The first jacket that I lined was my toile or muslin. The instructions are pretty easy to follow.


The most confusing part was connecting lining to lining and fashion fabric to fashion fabric to form a continuous circle.

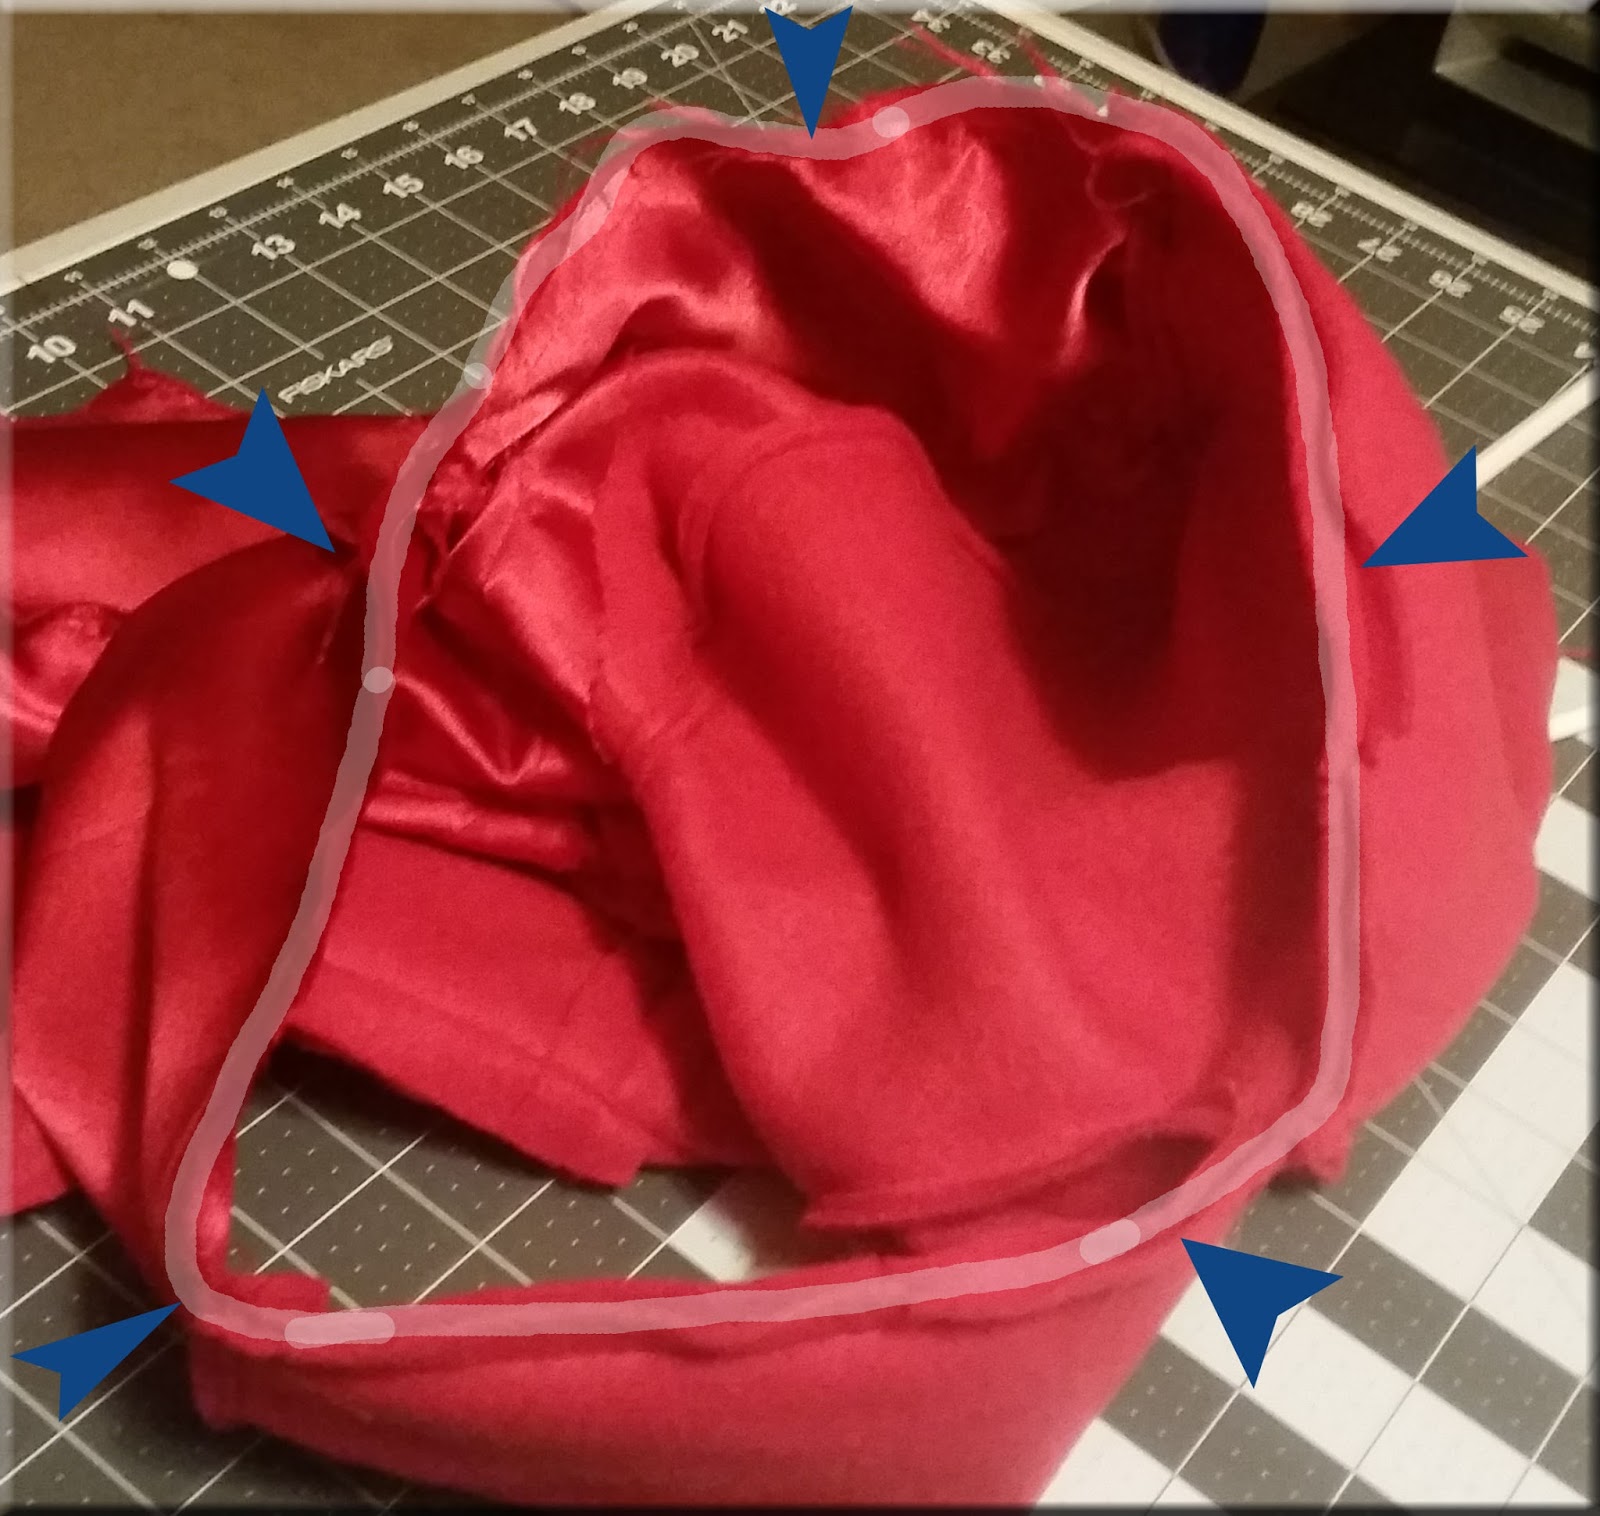
The very first jacket that I lined using this method is the red jacket you see below. I did not decorate it with much because my focus was on learning to line.  This method closes up the lining through one of the sleeves, I prefer this to closing at the bottom and then top stitching or slip stitching it closed.

 The second jacket that I sewed was using the same pattern with a few changes. I wanted a "pea coat" look for an infant girl.  I had  some gray fleece in my stash and used it. I know, I know it is mono chromatic , so I added some bows in the front to give it a "girly' look. This time around I did not have to look at the instruction for lining...that's how easy it is. The picture on the right shows the how the inside of the jacket is lined.

Friday, March 4, 2016

McCalls 6873...Boys lined vest and pants

It has been a while since my last post. I have been busy sewing infant clothing. I have been sewing sizes 6-9 months, mostly baby girl dresses. I enjoy doing girls' clothing because you can get really creative by putting bows, trim, and so much more on the their clothing. And the boys...well, ho-hum.

I was asked to make an outfit for an infant boy, somewhere around 8 months old. I paid a visit to Joann's Fabric. I paid and walked out with McCalls 6873. There were not a whole lot of choices amongst the big 3 when it came to infant boy patterns. You can find  a greater selection of doll and dog patterns than you can for an infant boy.  So I settled for what I thought might look nice if I tried my best.
The first vest and pants that I made would be my toile (test garment). It would be this garment that I would determine what changes would need to be made and what I would do differently on the garment I would give away. 
The pants were pretty easy.  I had never done a cuff, though, so the cutting out portion of the pattern was a bit confusing. I did do a flat felled seam on the outside legs.
I sewed through the vest with no problem until I had to close up the vest at the side seams. I think I was confused for about 1 1/2 hours. I was determined to understand the instructions before going to bed. Once I understood the instructions, I went to bed. 


The next day I began where I had left off. I couldn't believe the ridiculous method they wanted me to use to close up the side seams. The method left me with little room to sew the lining and the fashion fabric (See photo) Well, I sewldiered on and succeeded. This would be the first  and major change that I would make because I knew there had to be an easier method.

After hours of searching for a better method to attach the lining,  I found a website called Bloom's Endless Summer. Her website does give credit to Mary Ruth Shields, author of "Industry Clothing Construction Methods", but I thank her for posting the instructions online. The method is sooo much easier. It demonstrates how to close the vest at the bottom. The photo shows the part of the garment that you would leave open to turn the garment.

The second change would be the top pocket. There isn't a whole lot of room on such a small garment. The pocket was just too close to the buttonhole, so I eliminated the pocket and replaced it with an embroidered Pooh.

I think this is a very cute and versatile infant boys' outfit. The tie makes it even cuter. Pattern instructions could have been a little bit clearer, but once you get through the confusing part, sewing goes a lot quicker. I am sure I will be making more sometime this year.


Thursday, December 17, 2015

 This is the last stocking I will make for 2015. I started a little late making Christmas stockings, so I did not get to make as many as I wanted. I happen to like the monochrome scheme. Throw tradition out the window and this could be used at a wedding (in December, of course) as the ring pillow.


Fleece Socks For Winter

My daughter wanted fleece socks to wear with her rain boots, so I thought I would try making some for her. I didn't think the ones in the department store were worth $55.00, so I told her I could make them for less. I think she likes them better than the brand named fleece socks.

Fleece sock made using anti pill pink fleece and a knit fabric for the cuff.


Set below is white anti pill fleece with knit fabric on toe and heel of socks and a faux fur for the cuff